Wednesday, February 29, 2012

Community Garden Plot

For several months I've been trying to find a community garden plot to supplement the home vegetable garden. I had all but given up after many unanswered e-mails and strange garden locations. One garden was next to a meat packing plant and the chemical and other who knows what smell was unbearable. I couldn't imagine wanting to be there in the heat of the summer.

On Sunday my Mom and I were driving to the movies and we passed a field behind a church. In the distance I could see the fences that to me screamed community garden! I went home and searched online and found out some basic information. I was very happy to learn that there were available plots! And maybe the best part is that it's only 5 minutes drive from my house.


Today I sent in my plot fee for the garden. The plots are approximately 20X20'. I'll be able to keep the same plot each year, which means I can keep my fencing up and grow perennials. I've only seen the garden from far away so far. This weekend I may take a closer look if the weather holds up. The plot assignment will happen in a few weeks. I plan to grow mostly fruit and veggies for preserving and storage in the plot.

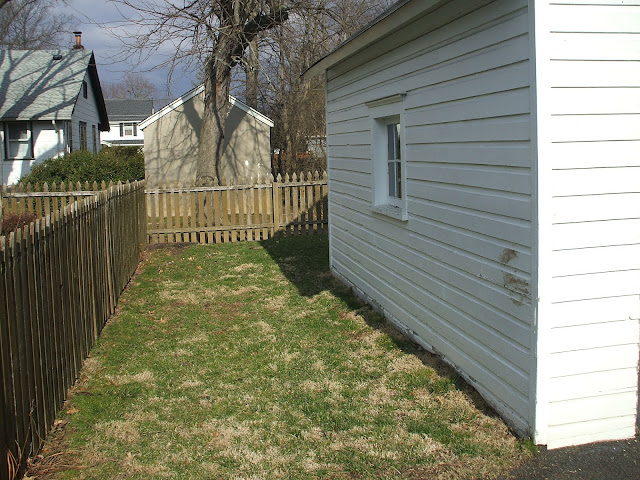
I took the photo above on my way to work. I noticed that some people have really high deer fencing. There are tons of hungry deer in this area so I'll have to do some research into how high my fence will need to be.


Tuesday, February 28, 2012

1st Completed Raised Bed

Now that we've been in the house for a year and a half, I'm very eager to get the vegetable garden finished. Last year I only grew a few vegetables in containers so that I could concentrate on the flower beds and inside projects. I really missed eating home grown vegetables, but maybe even more missed the planning and tending that leads to the reward.

This weekend I took a few trips to the garden center for: garden soil, 2 types of compost, vermiculite and peat moss. I added 1.5 inches of garden soil to the bottom and then mixed the other ingredients for the top 6 inches. I would have loved to have omitted the garden soil and use mix for the whole thing but there are several beds to do this year and the garden soil is a lot less expensive.


After I added the soil I gave it a nice long drink and added the hoops. I'll have to wait until next weekend to plant because it's dark by the time I get home from work. 


The weather has been nice enough to set the seedling out on the front porch for a few hours. They went back in when the wind started to pick up. As soon as the row covers come they will go into the garden under the hoops.


Sunday, February 26, 2012

7.5 Weeks Until Last Frost

The lettuce, kale and cauliflower seedlings are now on the unheated sun porch for the first phase of hardening off. 
The night time temperature are still dipping below freezing some nights, but there's a glimmer of hope in the 10 day forecast. I'm watching the temperatures closely because it's almost time to put the seedlings outside.


I ordered row covers last week that will hopefully keep the seedlings happy once they've been transplanted. Once they arrive I'll harden the plants off under the covers.


The plants are getting pretty big. I need to plant some more lettuce seeds this week so there will be an uninterrupted supply. 
The onions are went the porch today for the first time to harden off as well.


But the most exciting part of my weekend was: Planting the tomato seeds!


I'm trying some new varieties this year. I'm also trying Tomatillos because we love salsa in this house and also Ground Cherries (which I've never had but sound interesting).
I'm starting a few extra seeds in case some don't germinate or they have trouble after transplanting.

Seeds Planted 2/26/2012

4 Tomato Better Bush (for containers)
2 Tomato Black Krim
4 Tomato Principle Borgese (growing for sun dried tomatoes)
6 Tomato Roma (not sure where I'm putting these but love them for canning)
4 Tomatillo Verde
3 Ground Cherry (also called husk tomato)
3 Basil Mammoth 
3 Dill Dukat Leafy
3 Swiss Chard Ruby Red
2 Cabbage Early Jersey Wakefield
2 Swiss Chard Large Ribbed Dark Green
2 Cabbage Cover De Boeuf Des Vertus

Later in the week I will be planting Coleus and Petunias. It feels a little early for these but the packets say 8 weeks before last frost so I'll give it a try.


Saturday, February 25, 2012

My Buy Local Saturday

Our local farmer's market is held at the garden center every other Saturday in the winter. This makes for a dangerous combination for me as it feeds my "need for seed". I'm addicted to buying seeds this time of year and can't seem to go without buying more packets, even though I have no more room to plant anything. I need to find some will power! (or maybe buy more containers)
I did manage to leave without seeds, probably because JR was with me and he's already said I'm "obsessed with the garden" (guilty as charged!). I'll wait until next time when I'm there alone heeheehee.

I always feel like I've scored big after I've been to the farmer's market, even in the middle of winter. When I find something unusual it gives me inspiration to think outside of the normal routine and seek out new recipes.

Here's what I found: cabbage, 2 types of mushrooms, 2 shallots thrown in for free, beets and fresh mozzarella cheese.


I'm planning to roast the beets tonight to use during the week. The cabbage will be divided in half to make both a slaw with apples and walnuts and also some cabbage soup. I'm thinking about making Hungarian mushroom soup with 1 type of mushroom and a pizza with the other and some of the mozzarella cheese. 

Lately I've been trying to buy my food locally as much as possible. Luckily I work in a more rural area north of the city and there are several farms on my way home from work. One of my favorite to visit has the cows grazing right next to the farm market. They make the best ice cream and also sell meat from another local farmer. 
I try to stop there every other week to buy milk. This week I also picked up some turkey burgers, strawberry milk, small bottle of cream (to use in the mushroom soup and whipped on top of pudding). The rolls are made in here in Pennsylvania, I got them to go with the turkey burger.


For lunch I cooked 2 turkey burger sliders with some of the shiitake mushrooms. I also added some homemade bread and butter pickles that I canned last summer.


I recently read 2 books about local eating and farming that I loved. If you're interested in this subject you might want to check them out:

If you're going to buy this book I recommend buying a physical copy of the book and not the Kindle edition. There are many great recipes in this book and I find it easier to reference a physical book in the kitchen than an e-reader.

This gave me a lot of insight into what goes into creating a self-sustaining CSA farm. 

Both were very enjoyable winter reads that got me thinking about what I buy and from where, what I want to grow in my garden and making the most of what I grow.


Friday, February 24, 2012

Succession Planting

In past years I've planted only spinach and lettuce in the spring and then warm weather crops in the summer. One of my goals for this year's garden is to try succession planting in most of the new garden beds. I started my seedlings earlier than usual with hopes that I can harvest them in time to plant new crops in their spaces by early June. Then in late August to early September when the warm weather veggies are starting to die back I will have fall cold weather seedlings ready to plant for  fall/winter harvest.
I wonder if maybe my plan is too ambitious?  But it will be a learning experience at least.
Below is my planting plan for each season. I know it's hard to read what crops I'm planting, but as I plant the beds I'll go into the details.

The new raised beds will be next to the garage and the driveway. This area gets full sun except for the back of the yard by the compost bin which is is in shade for part of the day. We plan to expand the fence to protect the beds next to the driveway. The smaller squares and rectangles are pots/ containers.

Spring:

Within the next few weeks I'll be planting the seedlings I've started in the garden: onions, lettuce, spinach, kohlrabi, kale, swiss chard, broccoli, cauliflower as well as carrot, beet, bok choy and pea seeds.

Summer:
I know that weather will dictate how successful the summer crop will be. I have some quick growing bush beans ready if any of the crops get diseased or if I get an invasion of squash vine borers
I'm not sure of I'll get to planting the grapes this year or not. But I hope to at least get the bed ready for planting next year. I'm trying to plant some things that veggie-hater JR will eat, one of which is concord grapes. Most if the other veggies will be eaten fresh, canned or frozen for myself.

Fall:

In the fall I plant to repeat most of the spring plantings but increase the numbers to freeze/store for the winter. I will also plant more cucumbers and peas and also some garlic. It will be interesting to see if and how well this works for me.


Sunday, February 19, 2012

Building the First Raised Bed

Since my seedlings are making so much progress and the weather has been unseasonably warm, I decided it was time to get started on the prep work for the new garden.

Maybe it's wishful thinking, but I'm hoping this plastic will kill the grass and make it easier to remove in a few weeks. The first raised bed will go to the back of the plastic, next to the compost bin.


At my last house I used plastic raised bed corners and 2X6's. This time I decided to use untreated 2X8's and screw the corners with deck screws. I know this won't last for many years, but I'm not sure how I will like the placement of the beds as I've never grown anything in this spot. I can try it out and then in the future replace the beds with cedar and reinforced corners.
The bed will be 4'X6', I had them cut the lengths at the store so they would fit into my car.


I added 6 sections of  1" PVC pipe attached with brackets. These will hold the 1/2" PVC I plan to bend into hoops to create a hoop house.


The location is part shade so this bed will mainly be used for spinach, lettuce and other greens. I'll also use it to harden off my seedlings.

First I removed the grass with a shovel. I then used some potting mix from last years planting containers to level the area. I was amazed how dark and rich the potting mix looked next to my heavy clay soil.


I added some chicken wire that I had hanging around, left over from another project. I hear rabbits can chew through chicken wire, but I thought it was better than nothing...and it was free.

The image above shows the bed upside down. I attached the chicken wire to the bottom of the boards with galvanized staples.

I priced weed barrier cloth at the hardware store and decided to go with the free alternative: cardboard.


Now I just need to fill it with dirt. I'm planning to use the Square foot garden method for this bed so I need to take a few trips to the garden center to get everything I need for the soil mix.


Thursday, February 16, 2012

Seedling Progress

The seedling shelves are really starting to fill up in the basement. All of my cold crops and onions have been started, as well as some parsley.

The Pansies will go on the heat mat to germinate tomorrow. It seems like I may need to purchase another shop light so that there will be room to fit the tomatoes in a couple of weeks.

You may notice on the left side of the page that I've taken on the Urban Farm Handbook Challenge. Right now I'm working on a plan for February's challenge: Soil Building. I'll be posting more about it in the next week.

Monday, February 13, 2012

Snowy weekend projects

We've had a very mild winter in Southeastern Pennsylvania this year. Except for a freak snow storm in October we haven't seen much snow. Some of the bulbs I planted in the fall are already showing and some have bloomed. Hopefully they will survive and get back in rhythm next year.

Last year we planted a shade garden next to the deck. It's in an damp area under a large oak tree. I'm really looking forward to watching the plants fill in this year.
This is the shade garden after Saturday's snowfall:


I had hoped to clean out the pot that will be Mr. Figgly's new home, but that was put off due to the weather. Instead I spent the weekend working on projects, but I did get some pansy seeds started. They will be used in the front porch hanging baskets in the spring.


I've never started pansies from seed before. The packet says that the seeds germinate better after being given a "moist-cold" treatment. So I planted the seeds and put them in the fridge. They'll stay in there for 6 days and then go onto the warm kitchen counter to germinate. The variety is: Pansy, Swiss Giant Blend.


The other seedlings are making good progress. The cold season crops got their first drink of very diluted liquid kelp. The onions and spinach are also growing nicely.


I also decided it was time to sand and refinish the butcher block counter top in the kitchen. The butcher block takes a lot of abuse during the year. This is where most of our cooking and baking prep work is done because our kitchen is fairy small. It's also the counter that I use to cool my canning projects.


It's a very easy project and doesn't take much time. You can either hand sand with a sanding block and paper, or you can use a power sander. Either way sand with the grain of the wood and keep moving.

After sanding wipe the wood with a clean, damp cloth and then let dry.

Apply the oil with a brush, again with the grain of the wood.

Wait 15 minutes and then wipe off excess with a clean dry cloth.

Here's the refinished butcher block, ready for another year of abuse.


Saturday, February 11, 2012

Meet "Mr. Figgly" the Negronne Fig Tree

Last year I tasted fresh figs for the first time and loved them. It surprised me because up until then I had only had figs in Fig Newtons (which I don't care for). I love them fresh or bacon wrapped. I also made some into fig preserves that are delicious with brie and other cheeses.

I knew that I wanted to grow one in a container this year. Yesterday my local garden center announced online that they just got fruit trees in stock. So today I went over in search of my fig tree.

They had 3 varieties in stock. I chose Negronne because its a dwarf variety. Brown turkey is more frequently grown here, but the salesman said that the flavor of Negronne is better and it would be better suited for a container. The only drawback is it is less cold hardy (zone 7).


According to the recent zone reassignment we are now zone 7. But for now I'd rather not risk losing the tree, so it will overwinter on the back porch. Maybe in the future we will find a permanent home for it in the yard.  Negronne Fig trees are self pollinators, which means I only need 1 tree for it to bear fruit. I've named the tree Mr. Figgly...so from now on he'll be referred to as a "he".

The other nice thing about this variety is that it often produces 2 crops in a season: a heavier crop in July and then a lighter crop in September.

Meet Mr. Figgly:

Hopefully the weather will be better tomorrow and I can transplant him into his new pot. I'm really hoping this tree will be a great producer!


Wednesday, February 8, 2012

Starting Spinach Indoors

2 years in a row I tried to grow spinach from seed and failed miserably. I resorted to buying plants from the garden center to grow spinach in the garden. After a great deal of research I am surprised by the wide range of contradicting advice there is on the subject. One thing for sure is that spinach is one of more difficult seeds to start indoors.

Most seed charts I found recommend a germination temperature of anywhere from 40-75 degrees.
Some people have had success with presoaking seeds and then germinating them in the refrigerator.
I decided to experiment and try 2 different methods with my seeds this year to see if I could get them to germinate.

The first batch were started directly in seed starting mix. 3 seeds were placed in each space and covered with a thin layer of soil. after watering the flat was covered in plastic and placed on an area of the kitchen counter near a heat vent. 6 spots were planted. After 6 days 2 spots had germinated. After 14 days no additional seeds germinated. 18 seeds= 2 seedlings. Not good.

The second batch of (40) seeds were soaked in warm water (from the faucet) for 2 hours. They were then wrapped in 2 layers of damp paper towel and placed into a zip lock bag. I put the bag into the vegetable drawer or the fridge overnight. The second morning I removed the bag from the fridge and put it on the warm area of the counter top. It was put back into the fridge that night, I repeated this on the second day. Each day I checked to see if any of the seedlings have sprouted. Today is day 3 and when I opened the bag 4 seedlings had germinated. Tonight I checked again and another 8 had germinated! I will keep up the routine for several more days, but this method seems to work better for me than the previous method.

At the first sign of sprouting carefully remove the seedling from the paper towel. If you wait too long the roots will grow into the paper towel. You can use tweezers or the tip of a spoon to pick them up.

I like to mix the starter mix and warm water with my fingers. It helps me to gauge how much moisture to add.
The mix is then put into containers. Plant the seeds and cover with a thin layer of mix. Put the potted seedlings in a warm dark place until the sprouts emerge. Then put them under florescent lights to grow.

UPDATE: Today is the 6th day and 30 of the 40 seeds have germinated. I'm stopping the experiment today because I would have no room for 40 plants under my lights or in the garden! I'll definitely use this method from now on.

Tuesday, February 7, 2012

Early Spring Seed Starting

It's that time of the year when each night before bed I pore over seed catalogs, dreaming of the garden. It's how I make it through these long dark winter months.
This year I plan to start a new vegetable garden next to the garage and the driveway. It's a narrow space, but it gets direct sunlight for most of the day.  The back bed gets shade in the afternoon, so it will be used to grow lettuce and other cool season crops. More about the garden plan in future posts!
I've had problems in the past with damping off (the fungal disease that can kill young seedlings). It is caused by over watering. So this year I'm making sure to only bottom water the flats and will wait a little longer between watering's. Hopefully all of these little seedlings will survive until it's time to transplant!
This the new basement seed starting set up. I used this wire shelving for kitchen storge in my last house. Thanks to a nice sized pantry in the new house it was going unused.
On the top shelf some seeds are germinating on a heat mat. Our basement is small and stays warm (around 65 degrees).
The bottom two shelves are lit by shop lights hung with chain and "S" hooks.
As the plants grow I will raise the lights higher and higher, always maintaining a 1-2 inch space between the lights and the tops of the plants.

Varieties planted so far:
Cauliflower, Early White Hybrid
Broccoli, Calabrese Green Sprouting
Onion, Ringmaster
Onion, Flat of Italy
Lettuce, Paris Island Romaine
Lettuce, Red Romaine
Lettuce, Bibb
Lettuce, Black Seeded Simpson
Kale, Dwarf Blue Curled
Swiss Chard, Large Ribbed Dark Green
Swiss Chard, Ruby Red
Spinach, Salad Fresh Hybrid
Kohlrabi, White Vienna